
Custom Integration
OneClick Tracking corrects wrong attributions made by Meta, delivering real data based on UTMs and enabling safer scaling decisions.
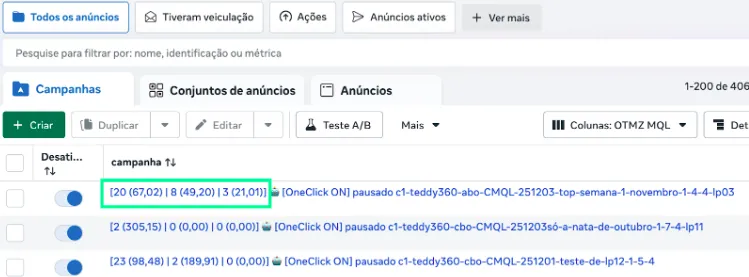
With OneClick Tracking you see the volume of real conversions per period right in your Ads Manager, making for a quick, clear audit without dashboards that are a hassle to keep up to date.
Note: OneClick Tracking removes the need for extra tracking tools!
Setting up OneClick Tracking
Section titled “Setting up OneClick Tracking”- Log in to your OneClick Ads account.
- Go to the “OneClick Tracking” tab, available in the left sidebar menu of OneClick Ads.
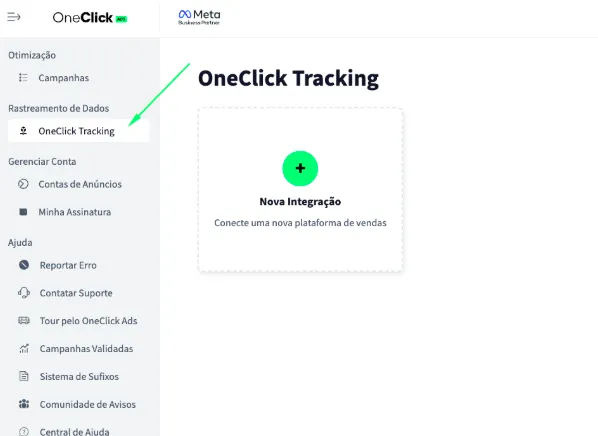
-
Click “New Integration”.
-
Select the product type (“Lead generation”, “Digital product” or “Ecommerce”) and click Continue.
-
Select the “Customizado” (Custom) platform and click Continue.
4.1 How to set up a Custom integration using Make AI:
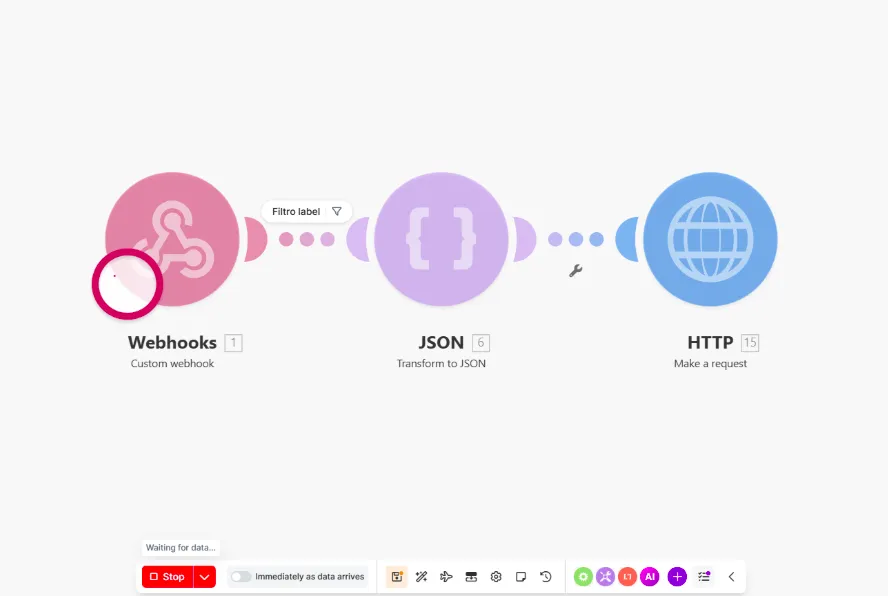
4.2 Use this ready-made layout in your Make:
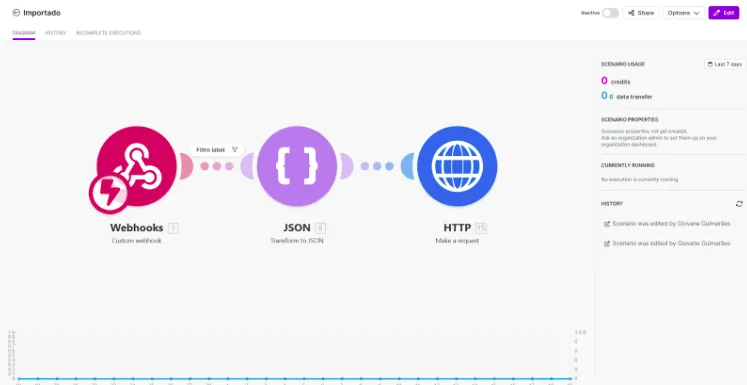
4.3 Click Edit and create the first webhook:
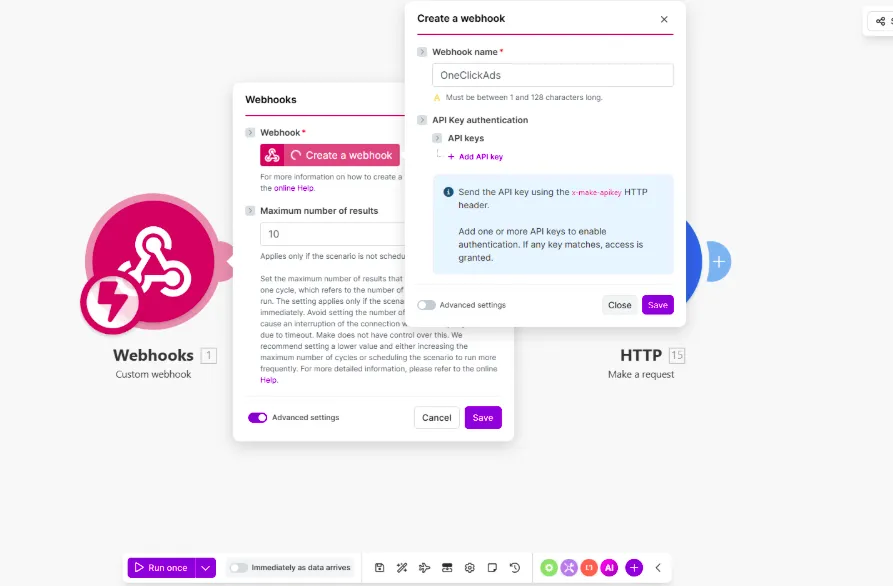
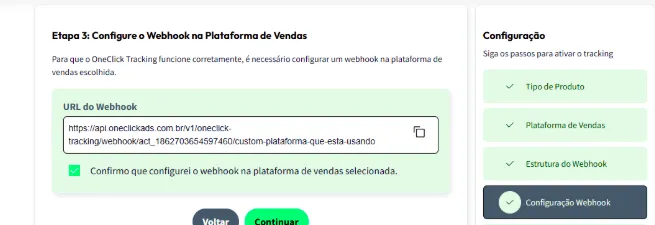
4.4 Copy the webhook link and paste it into the webhook integration of the platform you are using (you should find the place for webhook integrations in your platform’s app; in my case I’m building a custom integration with Chatwoot, which is a CRM):
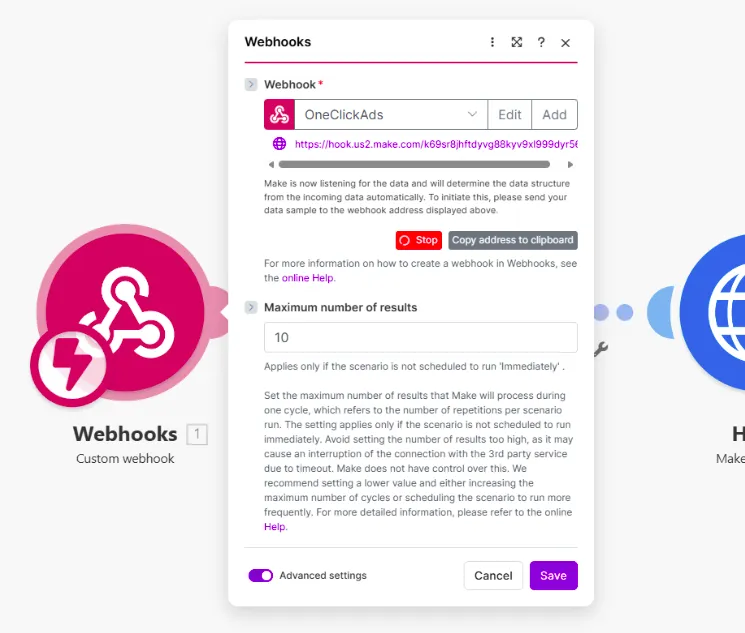
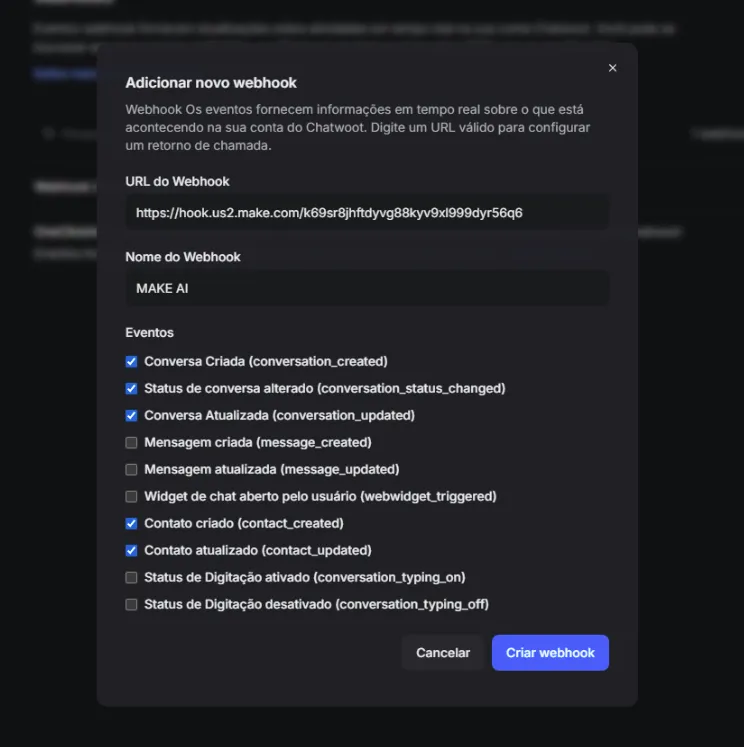
4.5 Now click Start in Make and wait until a webhook event comes in from your platform (for Ecommerce and Digital product these events fire when a sale happens, but for CRMs the events fire when a user is created or a stage is changed)
4.5.1 I’ll simulate a stage change in Chatwoot so we can move on:
I’ll add the label “etapa-1” to the user “João Teste”:
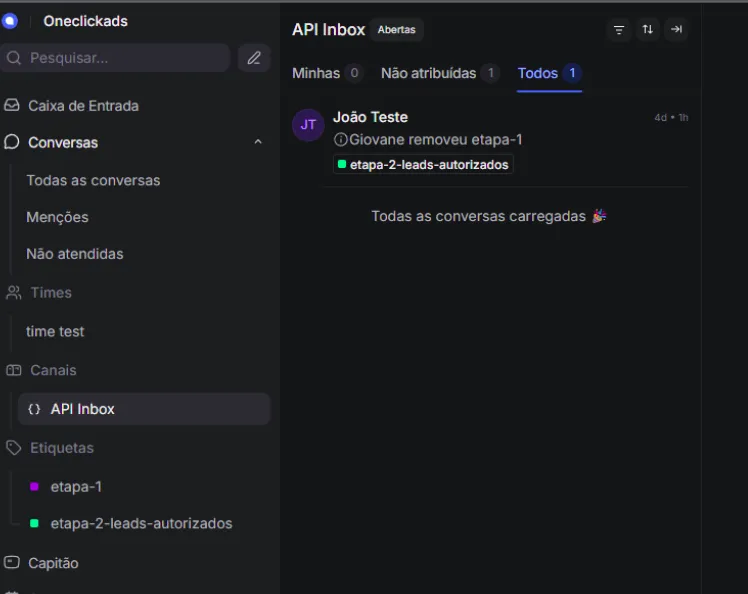
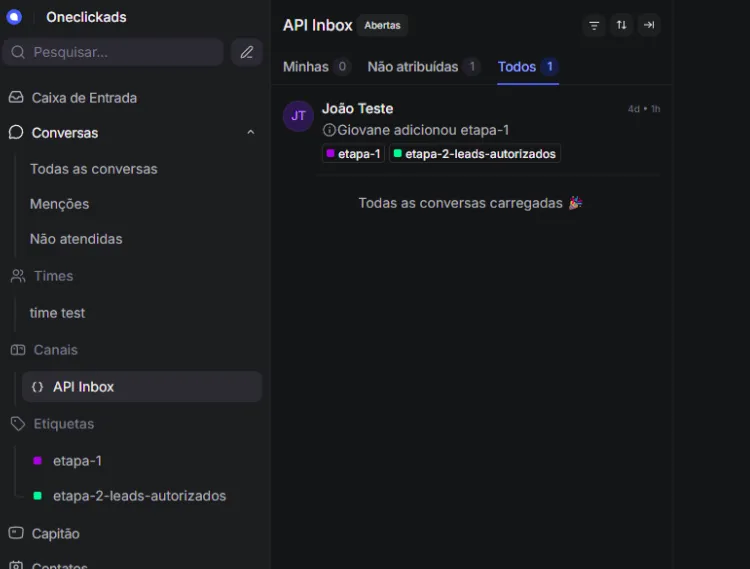
4.6 The event fired in Make:
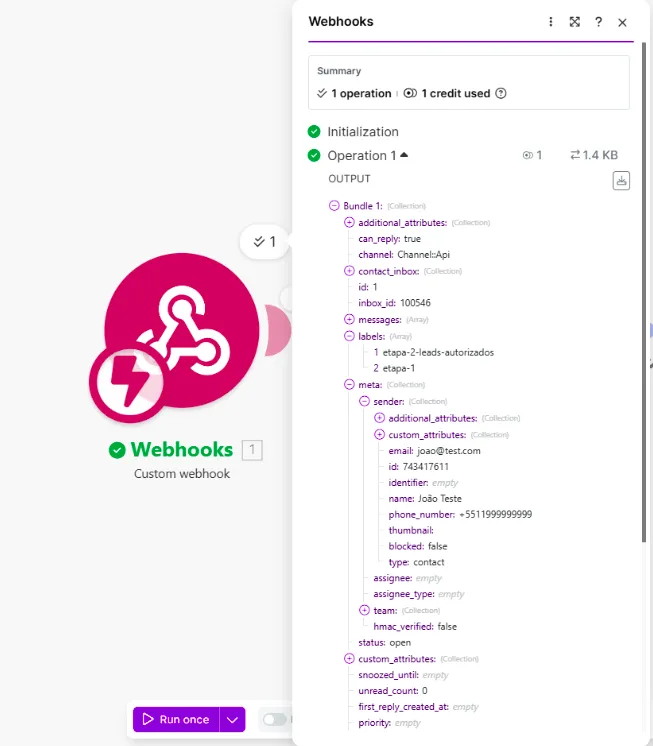
4.7 Now that Make has received the platform’s event, we can process it. The first step is to create a filter for the next step (for ecommerce/digital products we want to catch events with status = "PAID" or another status you want to track; for a CRM we want to track specific stages or labels).
How to choose the operator type in the filter (Array Operators vs Text Operators):
- Fields that are lists/arrays (for example
labels,tags,items) must be filtered with Array Operators. Use operators such ascontainsto check whether the list contains a specific value. Example: if the labeletapa-1is insidelabels, choose thelabelsfield → Array Operators →contains→etapa-1. - Fields that are simple text values (for example
status,email,phone) must be filtered with Text Operators. Use operators such asequals,containsorstarts withas appropriate. Example: forstatus = "PAID"choose thestatusfield → Text Operators →equals→PAID. - Note: if you are selecting a regular value (not inside a list), always choose Text Operators instead of Array Operators — this avoids false negatives and incompatible operators.
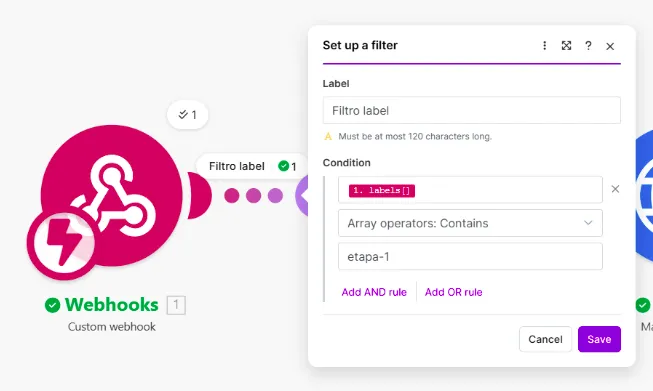
In our example the value we want to track (etapa-1) comes inside the labels list, so we’ll use Array Operators to find that item in upcoming events:
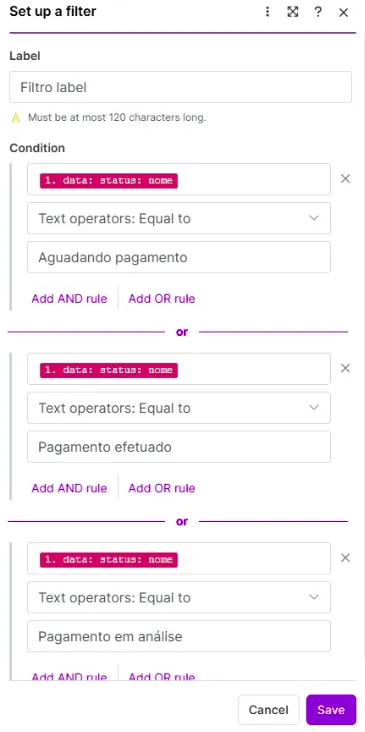
As an example of a filter when the field is a simple value (not an array), see the image below, which shows Text Operators selected and an equals to compare an exact text:
With the right filter created (Array or Text Operators), you make sure only the events you want move on to the next actions in the scenario.
4.7 Now, with this event recorded in Make and the filter ready, we can map the parameters we want into the shape we need:
For custom CRM integrations, we need to send the data to OneClick following the payload below (payloads vary from integration to integration; for Ecommerce and Digital product the payloads are different, but the process is the same):
{ "payload_id": number, "platform": "nome_da_plataforma_cadastrada", "secret_key": "sua_chave_secreta", "lead_id": number, "data": { "lead": { "created_at": "string", "pipeline_id": "string", "tracking_parameters": { "sck": "string", "src": "string", "utm_source": "string", "utm_medium": "string", "utm_campaign": "string", "utm_content": "string", "utm_term": "string" } }, "customer": { "name": "string", "email": "string", "phone": "string" } }}Copy and paste it into Make’s JSON:
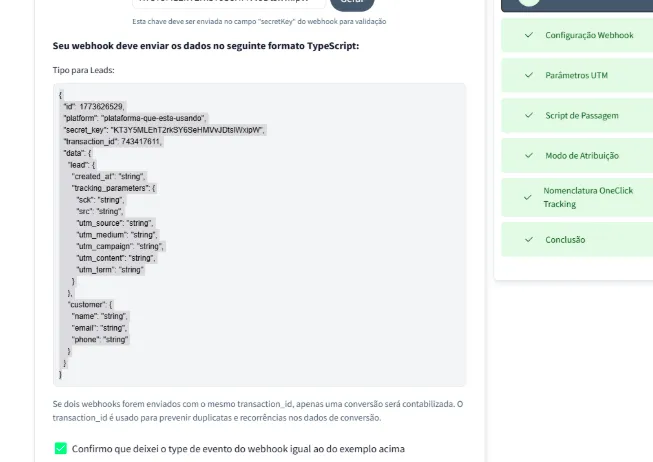
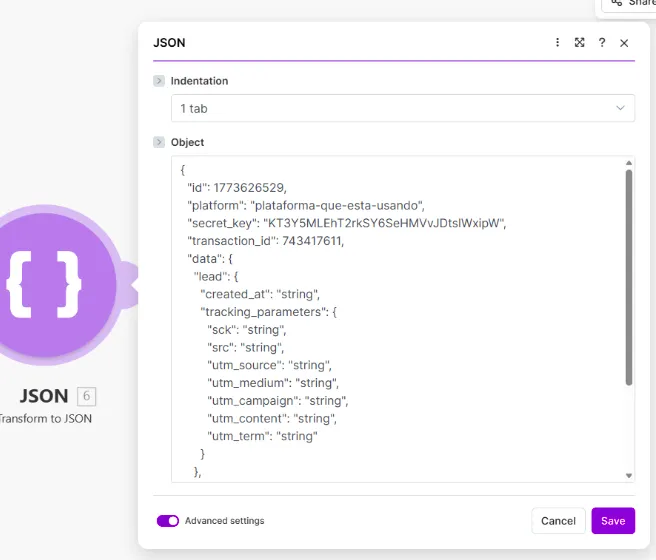
Now let’s map all the parameters we need (when you click inside the Object, a small box opens with the event Make received):
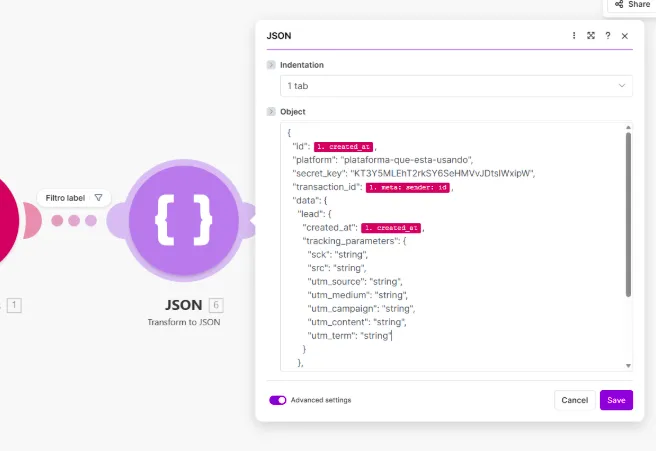
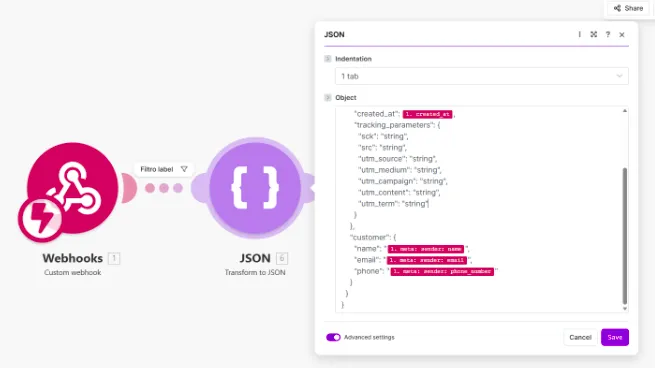
_ It is very important to fill in the UTM parameters (in this example, no UTM came in the webhook event). That’s why you should send Make an event that contains the UTMs, so tracking can attribute the conversions to the respective Campaigns, Ad Sets or the Ads themselves _
4.8 With the JSON configured, the last part is sending this mapped event to OneClick Ads; to do that, we configure the HTTP module:
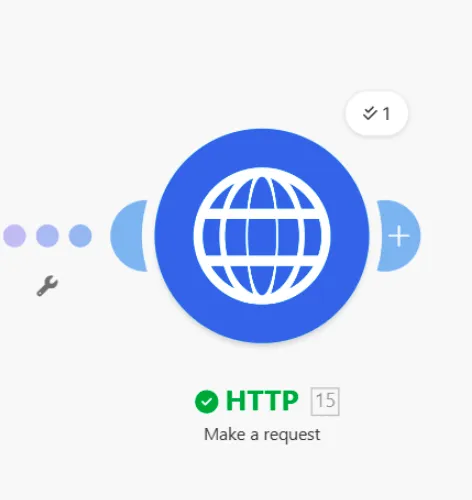
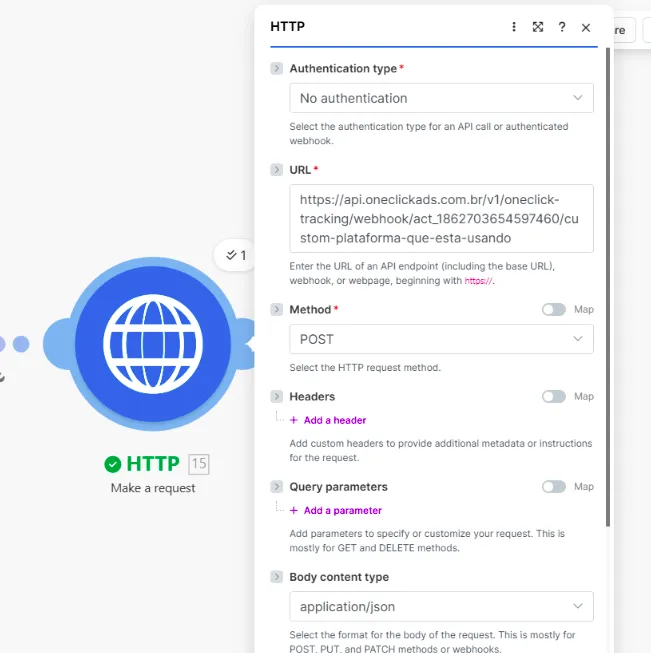
- Paste the webhook link provided in step 3 of the Tracking setup into the URL parameter in HTTP:
-
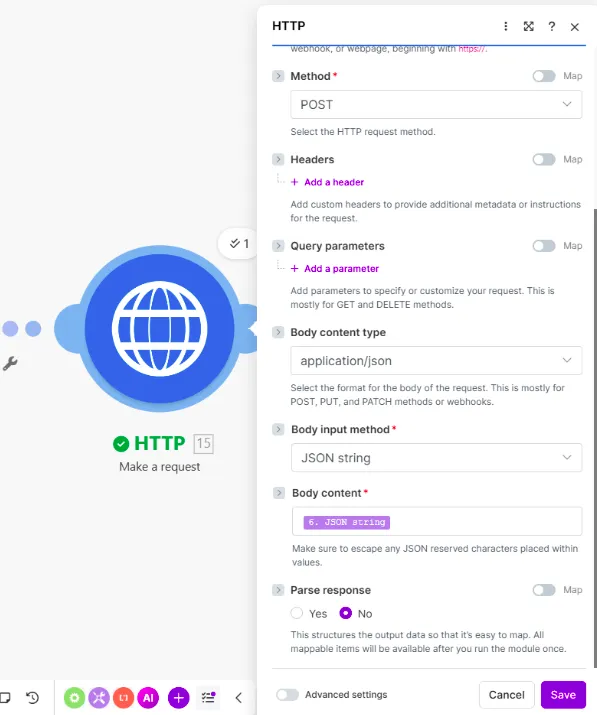
Select the method: “POST”
-
Body Content Type: “application/JSON”
-
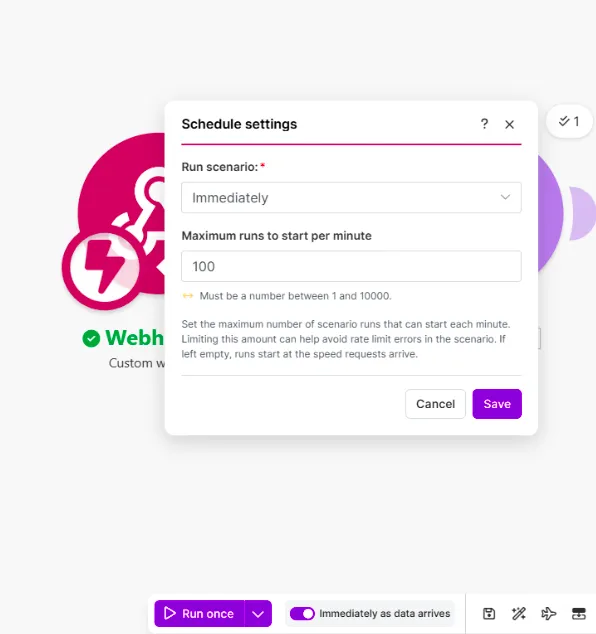
Body Content: “JSON string” (obtained in the previous step) 4.9 Save the integration and turn on “Immediately as data arrives”:
- Go back to the “Scenarios” tab and turn on the integration (switch on the left):

Now every event sent by your platform will be received and processed by Make! 6. Go to the next step of the integration and copy the UTM Script generated inside OneClick Tracking.
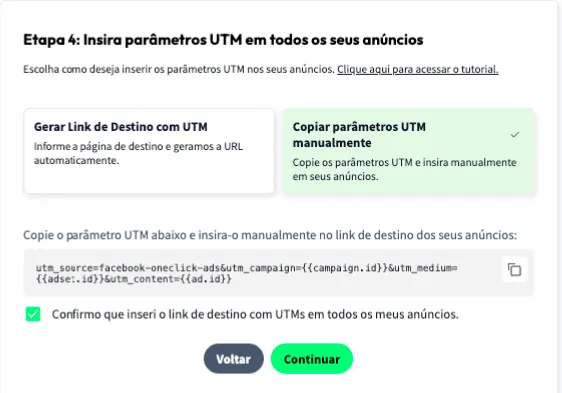
6.1. Paste it into the “URL parameters” field in ALL of your ads in Ads Manager, as shown below:
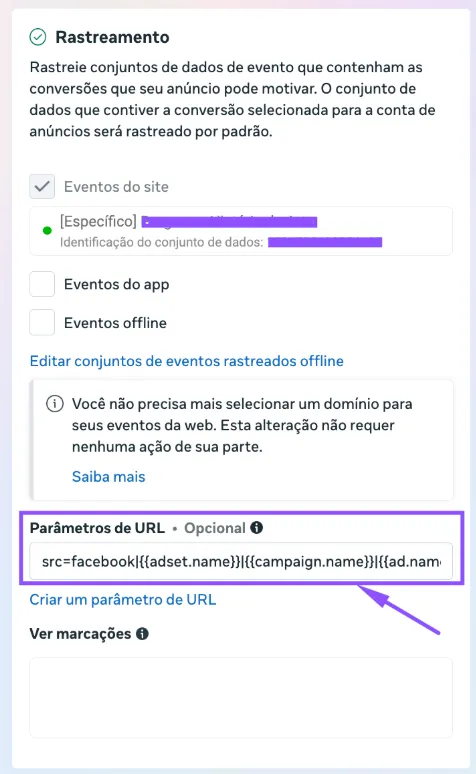
-
Install the UTM Passthrough Script on all your sales pages, so the UTMs are loaded automatically into the card of each lead generated. a. You can install it on your site via Google Tag Manager or, preferably, directly in your site’s header.
-
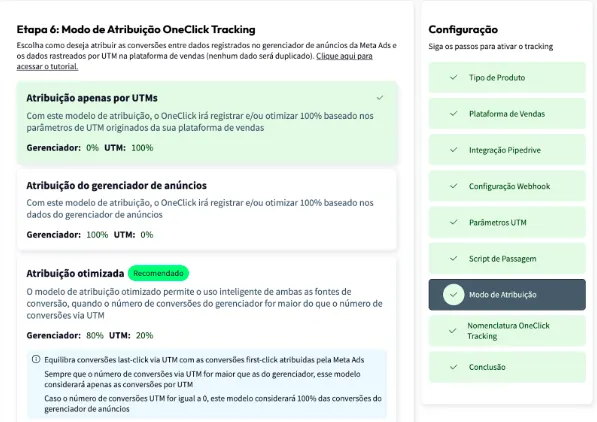
Set the Attribution Mode.
- Watch this video to understand each model.
- Click Continue.
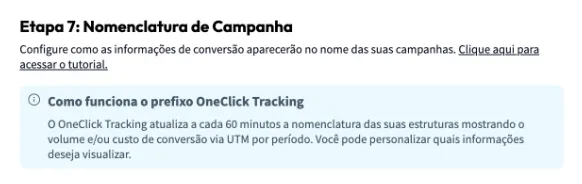
- Define the Naming Convention that your campaigns, ad sets and ads will receive in your Ads Manager and click Next.
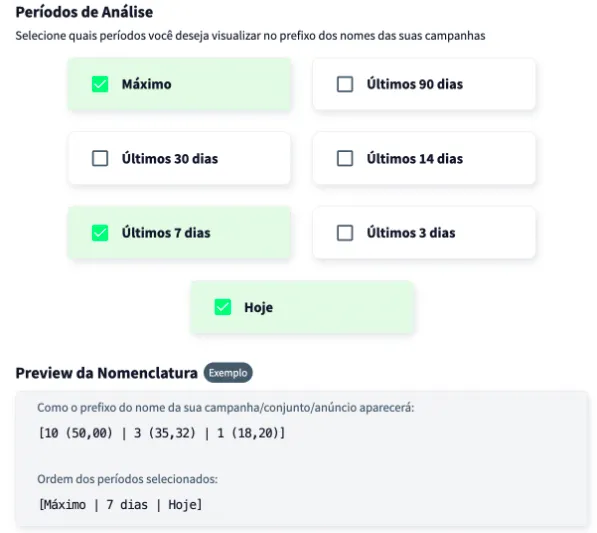
Wait at least 24 hours for the setup to take effect, and all your campaigns (those that receive conversions) will start recording conversions right inside Ads Manager.
Important Notes
Section titled “Important Notes”- Only campaigns created after the setup will have access to the “Maximum Period” data. This does not affect OneClick Ads optimization on older campaigns in any way.