
BW Commerce Integration
Learn how to set up OneClick Tracking on BW Commerce.
OneClick Tracking is a feature for Meta Ads advertisers who use BW Commerce as their e-commerce platform. It provides immediate, accurate conversion tracking.
With OneClick Tracking you see the volume of real conversions per period right in your Ads Manager, making for a quick, clear audit without complicated dashboards that need to be kept up to date.
Note: OneClick Tracking removes the need for extra tracking tools!
How to Plug OneClick Tracking into BW Commerce
Section titled “How to Plug OneClick Tracking into BW Commerce”-
Log in to your OneClick Ads account.
-
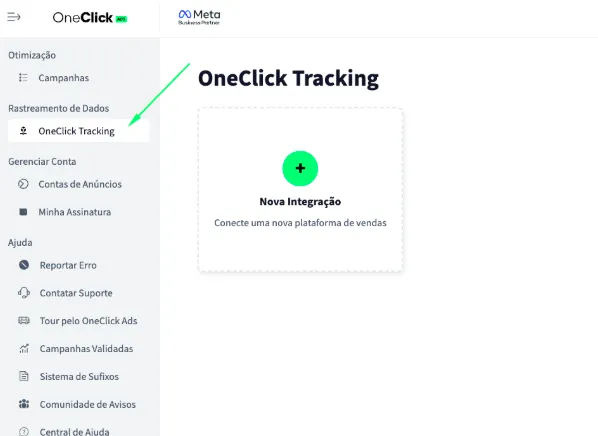
Go to the "OneClick Tracking" tab, available in the left sidebar of OneClick Ads.
-
Click "New Integration".
-
Select the "E-commerce" product type and click Continue.
-
Select the "BW Commerce" platform and click Continue.
- Enter your BW Commerce store address and the BW Commerce API Token, and click Connect BW Commerce. With these two pieces of information, OneClick creates the webhook in your store automatically — you don’t need to configure anything inside BW Commerce.
How to get the BW Commerce API Token
Section titled “How to get the BW Commerce API Token”6.1. Log in to your BW Commerce account.
6.2. In the admin dashboard, go to “Configurações > Integrações” (Settings > Integrations) and generate an API token. BW Commerce’s official step-by-step is at Como criar e obter o token da API para integração (How to create and get the API token for integration).
6.3. Copy the token and paste it into the “BW Commerce API Token” field in OneClick Tracking.
6.4. When you click Finish at the end of the setup, OneClick registers the “Alteração de status de pedido” (order status change) webhook in your store — this is the event BW Commerce fires whenever an order changes status (including when it is paid/approved), and it’s the one OneClick Tracking uses to identify a confirmed conversion. If you had already connected this store before, the existing webhook is updated, not duplicated.
-
Copy the UTM Script generated in OneClick Tracking.
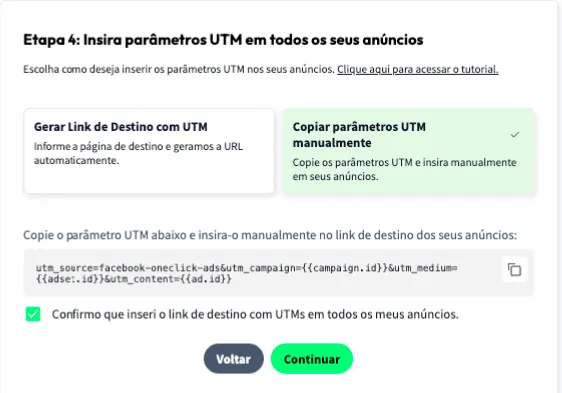
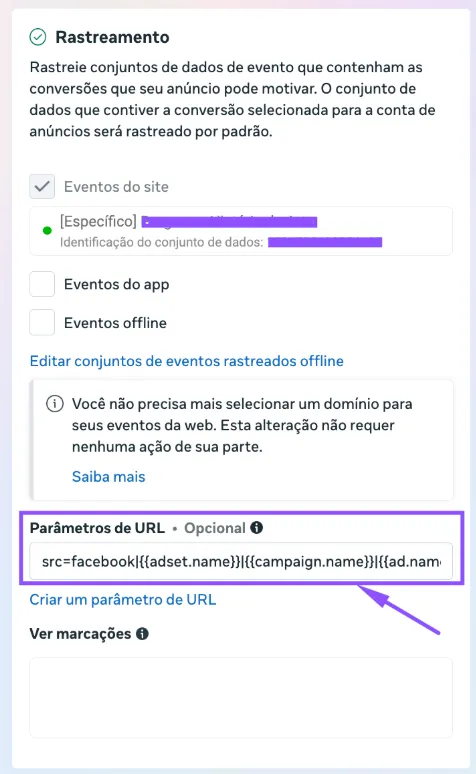
7.1. Paste it into the "URL parameters" field in ALL of your ads in Ads Manager, as shown below:
- Add the UTM Passthrough Script to all your sales pages, so the UTMs are carried through to the final checkout page: a. You can install it on your website via Google Tag Manager or, preferably, directly in your website's header.
-
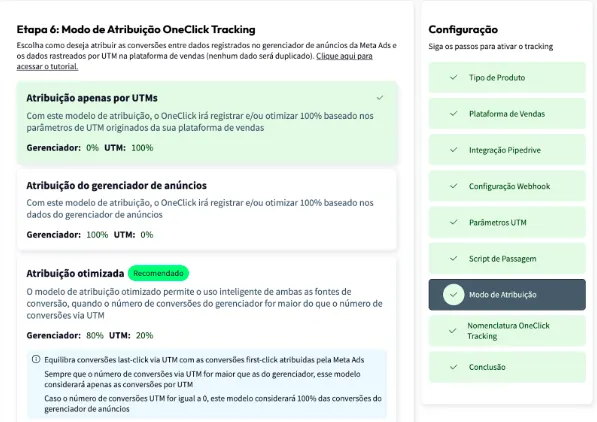
Set the Attribution Mode.
- Watch this video to understand each model.
- Click Continue.
-
Set the Naming Convention that your campaigns, ad sets and ads will receive in your Ads Manager and click next.
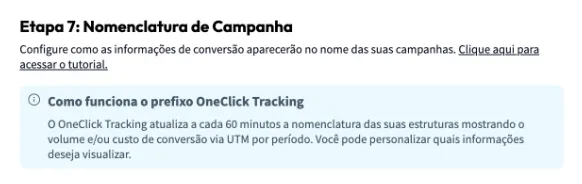
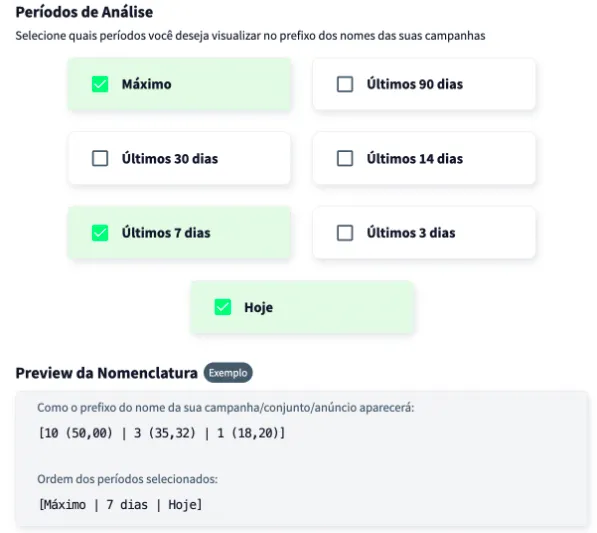
Wait at least 24 hours for the setup to take effect, and all your campaigns (those that receive conversions) will start recording conversions right inside Ads Manager.
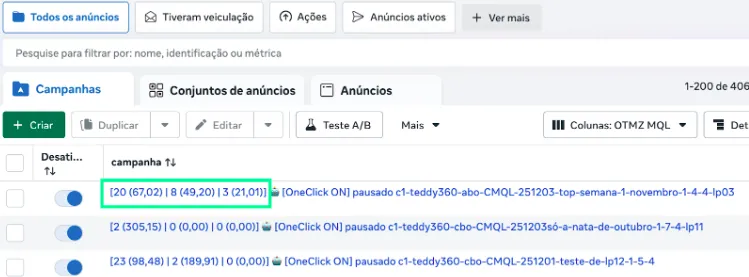
Important Notes
Section titled “Important Notes”- Automatic webhook: the “Alteração de status de pedido” (order status change) webhook is created by OneClick with the token you provided. It is not necessary — nor recommended — to manually create a webhook in the BW Commerce dashboard pointing to the same URL: two webhooks would deliver the same order twice.
- Revoked token: if you revoke or regenerate the token in BW Commerce, tracking stops working. Re-edit the integration in OneClick Tracking and paste the new token.
- Conversion source: BW Commerce does not send
utm_*fields in the order. The UTMs are read from the order’s origin URL, which is the URL through which the customer reached the store — that’s why the UTM Passthrough Script is required. - UTMs in ads: The UTMs must be present in the ad URLs and passed through to the checkout page via the UTM Passthrough Script for tracking to work correctly.
- Availability: This integration is being rolled out gradually and may not be visible to every account.